Having a customizable eCommerce platform means that there are a lot of available settings to tweak. The Setup Wizard takes you through all the necessary steps to set up your store and get it ready to start selling!
Immediately after activating the plugin, you are taken to the Store Profiler. The store profiler will allow you to provide the most important details about your store: where is it based, what industry, which products, etc.
Once you’ve gone through that, we’re providing a checklist to make sure that all aspects of your online store are ready to start selling.
Store Profiler
Where is your store based?
In this step you provide the location of your store and if you’re setting up a store for a client.

Build a Better WooCommerce
A pop-up will ask if you’d like to participate in improving WooCommerce. You need to click in the “Yes, count me in!” checkbox to participate.

In which industry does the store operate?
Here, you can select in which industry or industries your store operates. If you select “Other” you’re able to identify a different industry.

What type of products will be listed?
You’re able to identify which product types you plan to sell in your store and learn more about some types of products, such as Memberships or Subscriptions. If you choose a paid product you can easily purchase it later in the wizard.

Tell us about your business
In this section, you can provide more information about your business, which will help us tailor the WooCommerce experience according to your needs.

You can also easily install useful marketing tools that will help you grow your business.
- Mailchimp for WooCommerce allows you to automate emails, send promos, and build mailing lists.
- Facebook for WooCommerce brings your products to social media.
- Google Ads for WooCommerce allows you to show your products on any Google platform, such as Search, YouTube, Gmail, and more.
All extensions and services can be deactivated and uninstalled if you later decide to not use them.
Choose a theme
Choose how your store appears to customers.
- You can proceed with your current theme, if you have one.
- Choose a new theme among our free and paid options.
- Upload a theme as well, which is the last option in the list.
You can always switch themes and edit them later.
Enhance your store with Jetpack and WooCommerce Services
If you want to collect automated taxes, print shipping labels we suggest you install Jetpack and WooCommerce Services as it will make the rest of the store setup easier for you. All extensions can also be deactivated and uninstalled, if you later decide to not use them. There is no obligation.

Store Setup Checklist
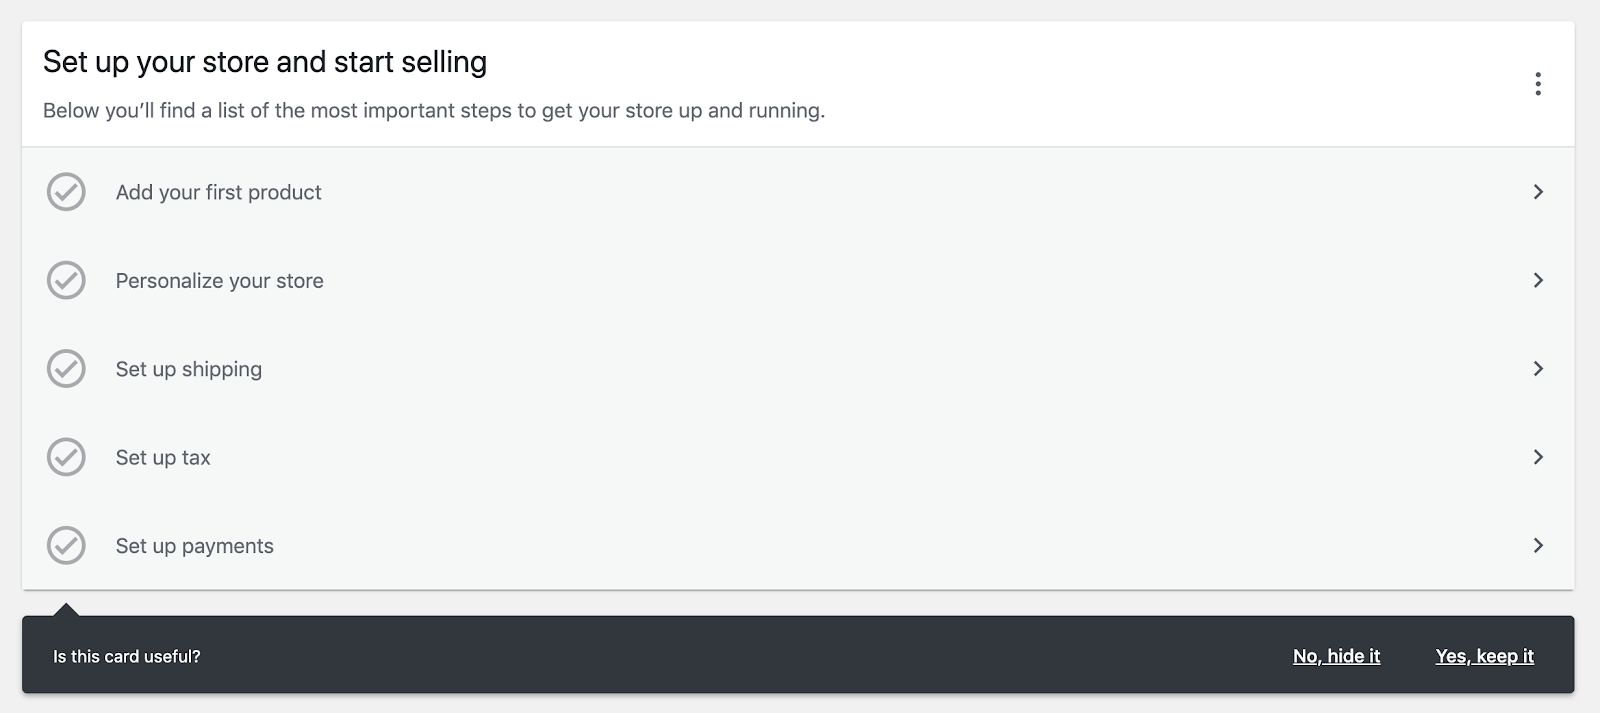
After you finish or skip the Store Profiler stage you’ll have access to a list of the most important tasks that you need to complete to get your store up and running. Those tasks aim to guide you through these steps and finish the store setup as quickly and efficiently as possible.
You can skip the checklist whenever you want.
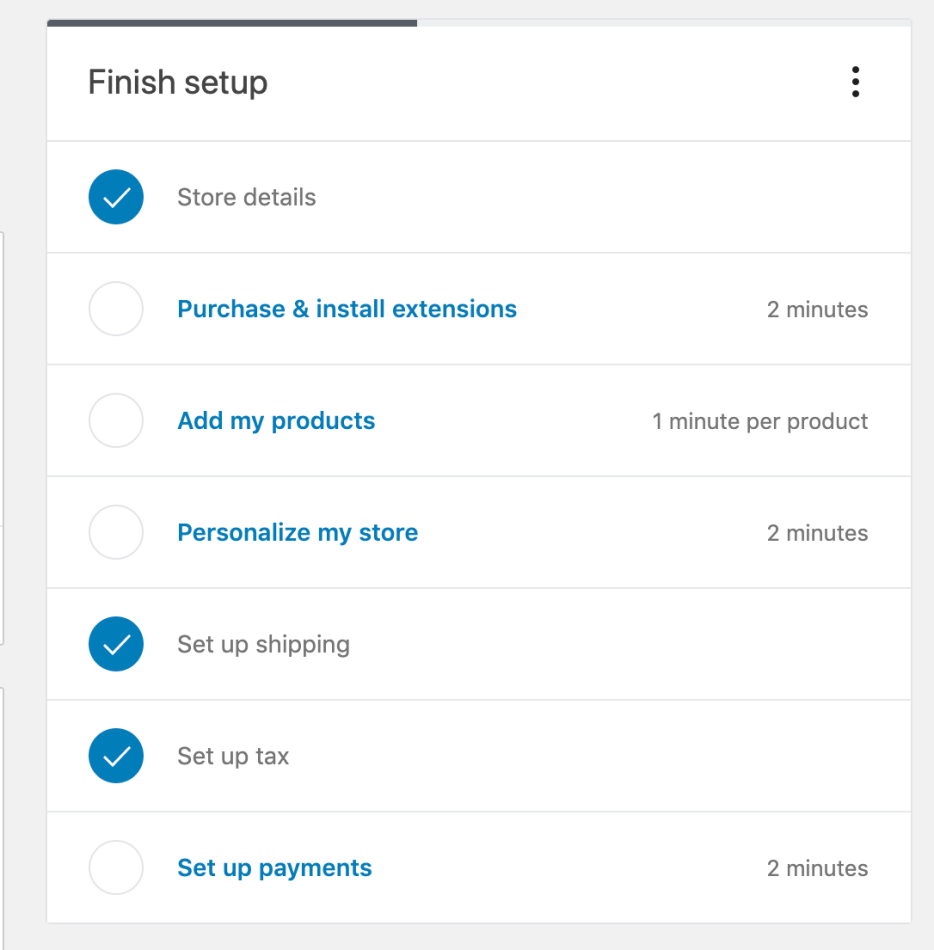
Store details
You can easily go back to the Store Profiler flow, in case you want to change and information or complete the information if you skipped this step.
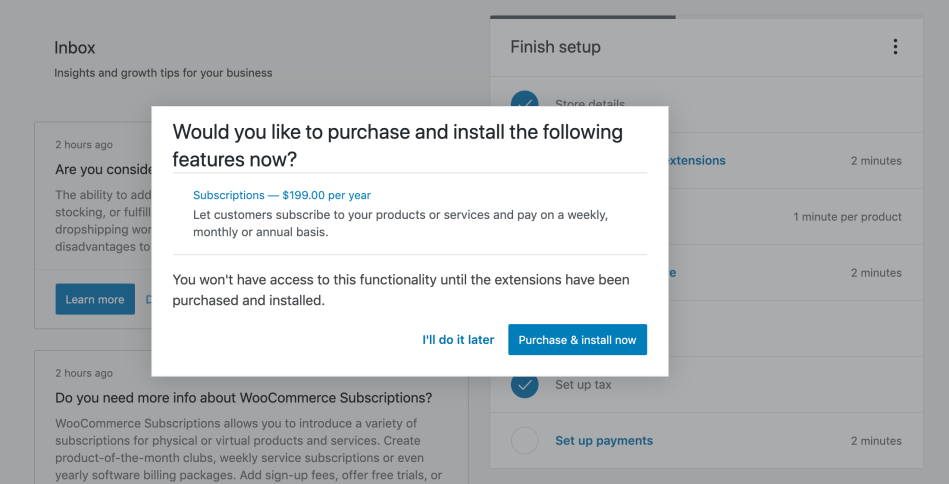
Purchase & install extensions
If you selected any paid extension or theme during the store profiler you can finish your purchase by clicking on this task. If you select “Purchase & install now” it will take you to the checkout page on woocommerce.com to finish your purchase.
Add your first product
In this step we’ll guide through adding products manually, importing from a sheet or migrating from another platform.
- Add manually. See the documentation on Adding and Managing Products in order to know what to expect during the steps of creating a product.
- Import. See the documentation on Product CSV Importer and Exporter in order to know what to expect when importing products. You can use this sample CSV file for products import testing.
- Migrate. See the documentation about the Cart2Cart extension to know more about using a product migration service.
- Import Sample Data. Not ready to commit to a product, but want to test out the store? Add in fake data to see what a full store would compromise of. See the documentation on the Importing WooCommerce Sample Data for instructions.

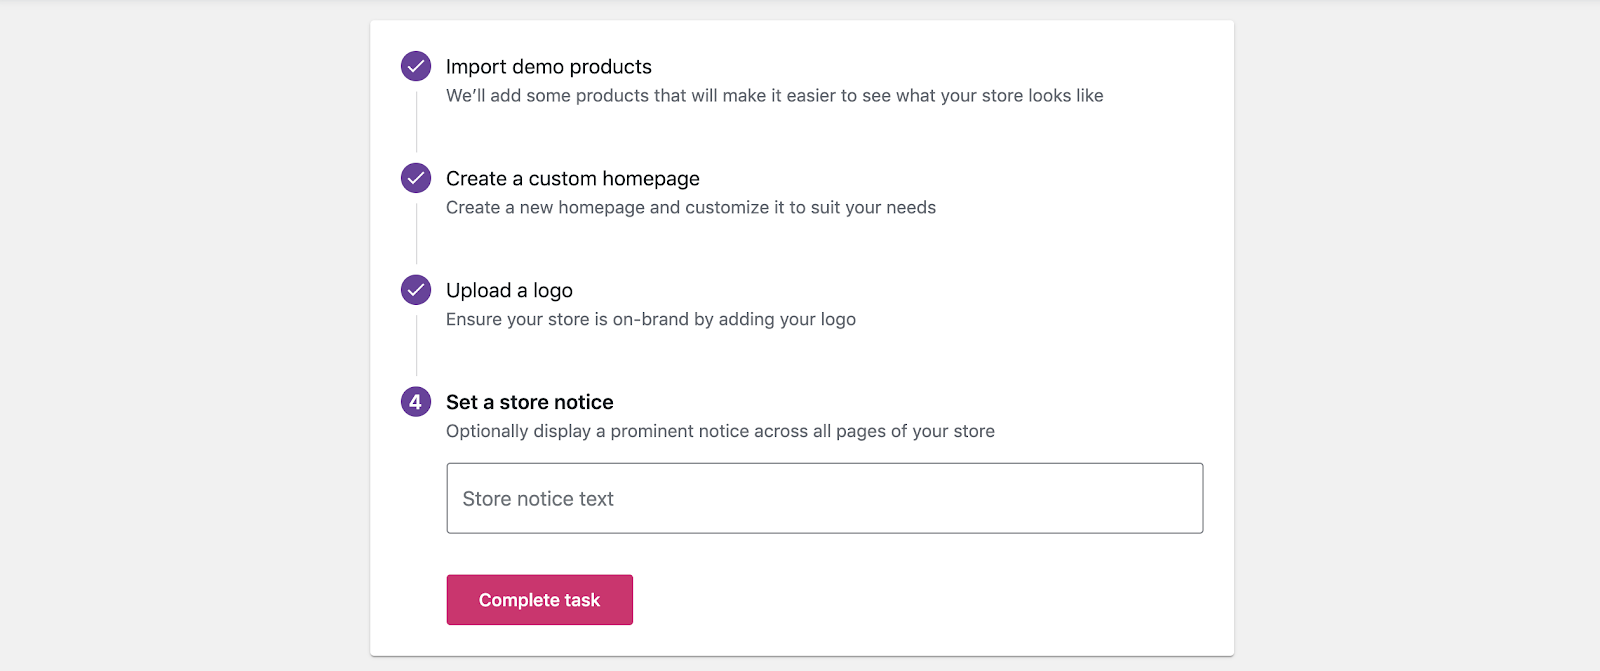
Personalize your store
Here, we will help you get started with customizing your store’s look and feel.
If you still don’t have any products we can automatically import some demo products, so you can see how they look both in the store and in our product management interface. You won’t see this step if you already have products.

Then we can automatically create a homepage for your store and you can always edit it later.
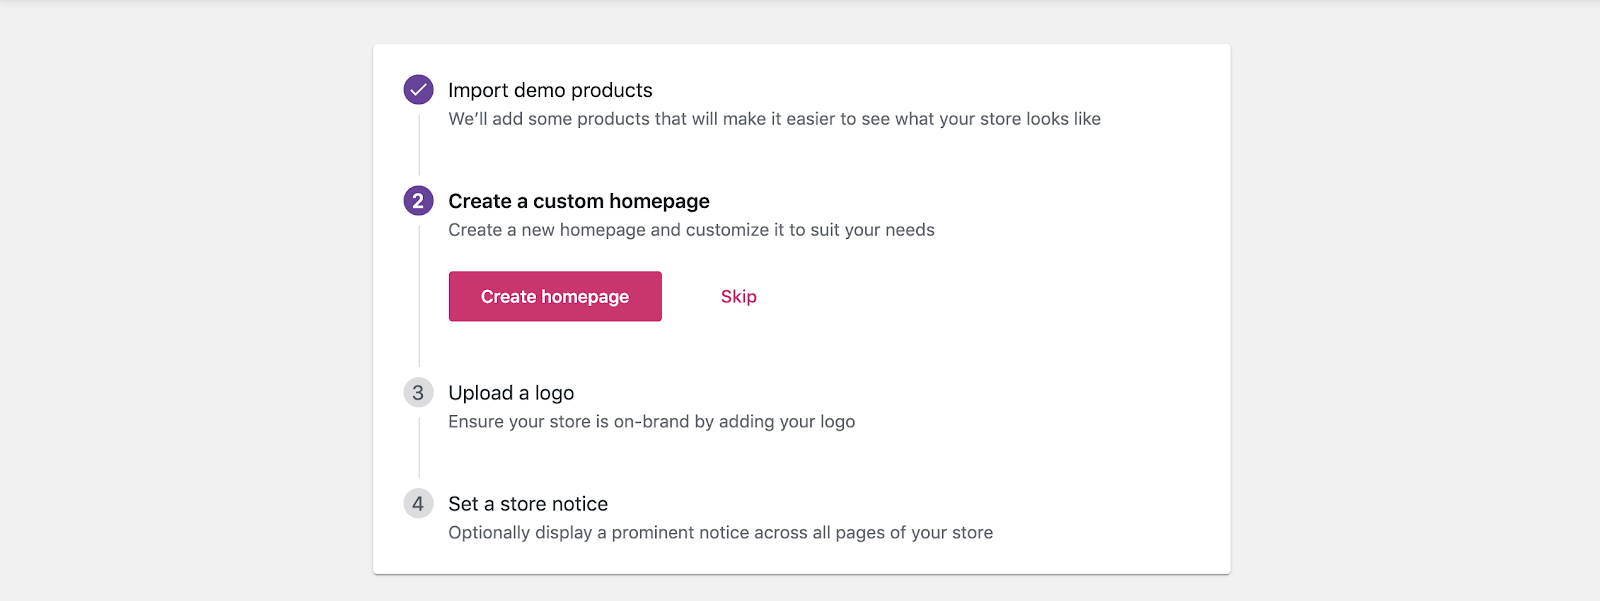
You can also upload your store’s logo right away in a simple step.

Finally, you can easily display a prominent notice across all pages of your store. Note that the visibility of this notice and its place on your store will be affected by the choice of theme.
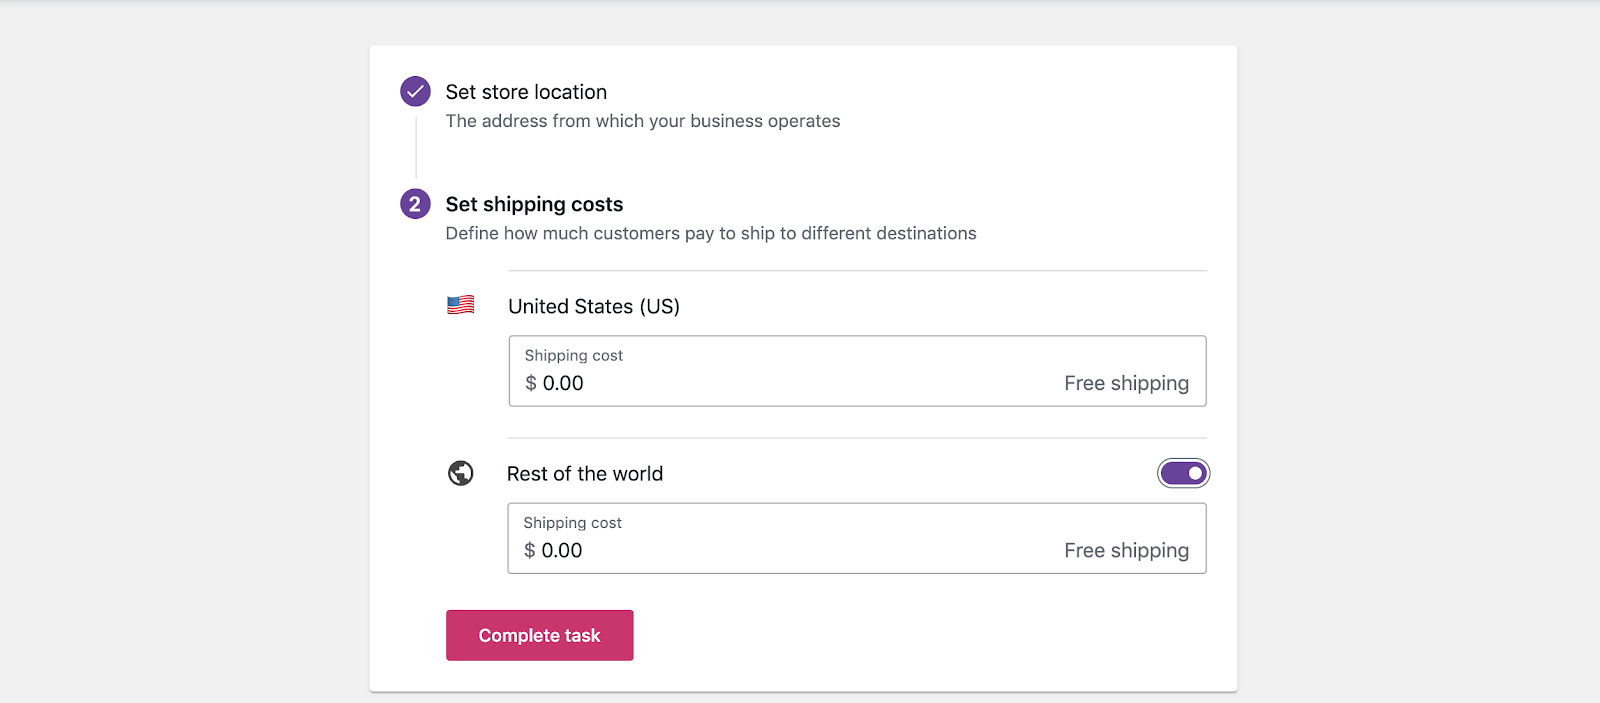
Set up shipping
You can confirm your store location or add it if you haven’t done it before.
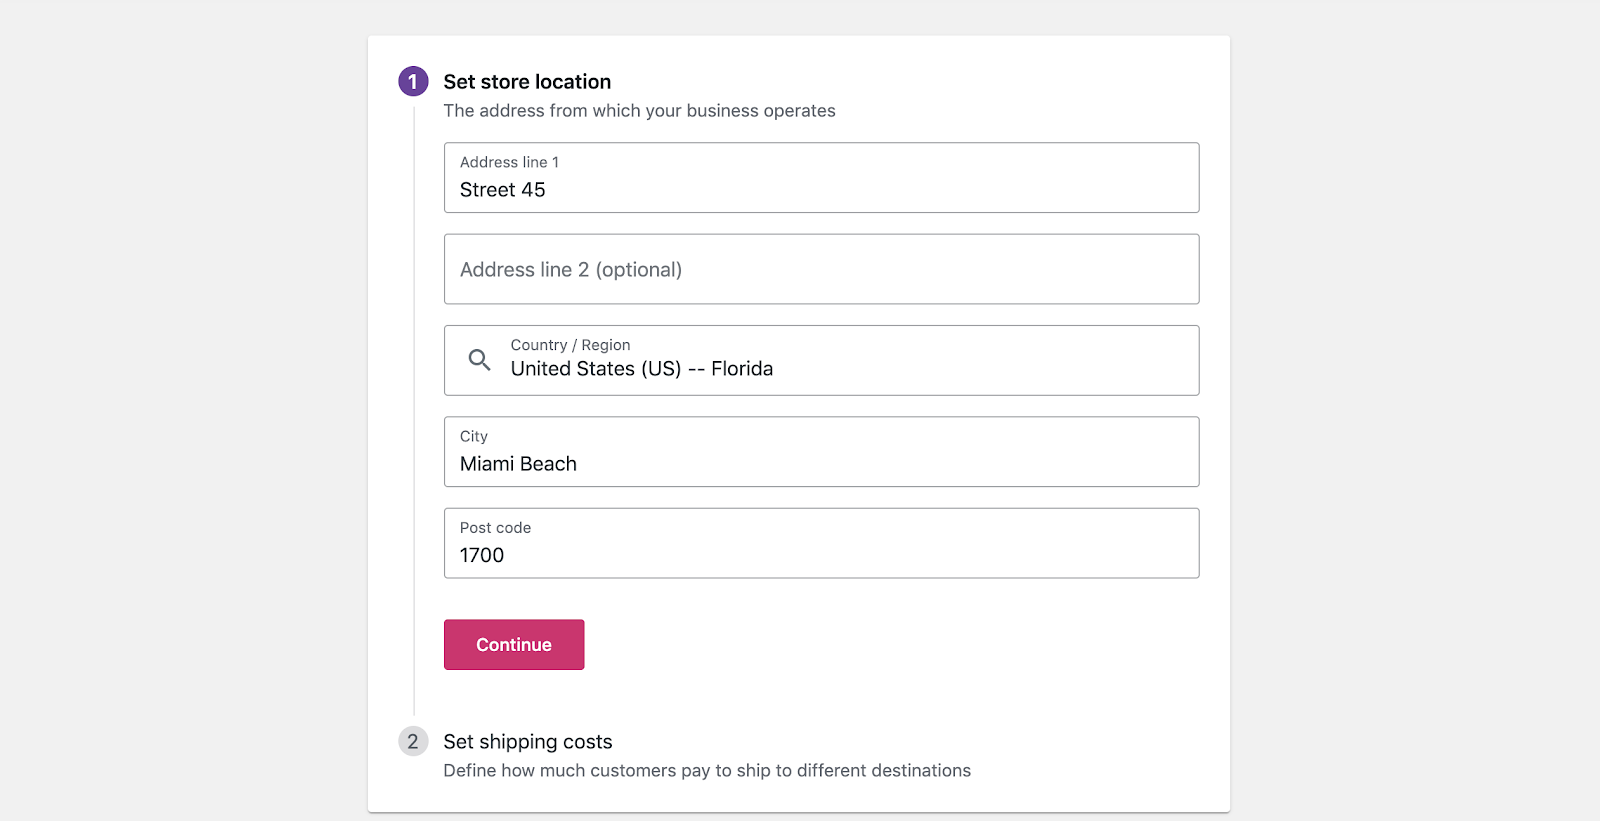
You can also set the shipping costs for your country and for the rest of the world as well. Adding shipping cost for the rest of the world can be disabled in this step.
Set up tax
You can confirm your store location or add it if you haven’t done it before.

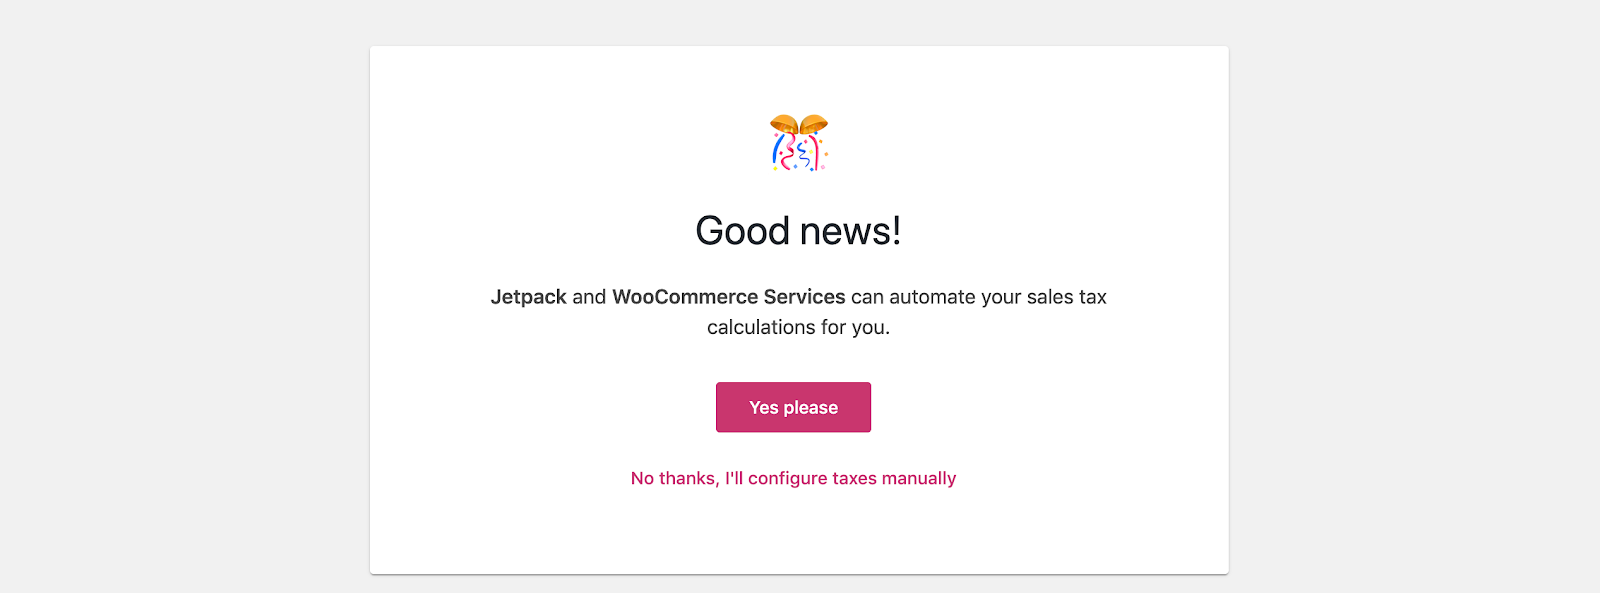
If you have Jetpack and WooCommerce Services installed you can start automatically calculating taxes by connecting your store to WordPress.com. Visit this page if you want to learn more automated taxes and the countries where it’s available.
If you click to connect your store you’ll be redirected to the WordPress.com flow, so you can create an account or login to an existing account.

After you finish that process, you’ll be redirected to the tax tasks where you can enable the automated taxes calculation by selecting “Yes please.”
If you choose to set up tax rates manually you will be redirected to the WooCommerce Settings. See the documentation on setting up taxes in WooCommerce to learn more about how to set them up manually.
Set up payments
In this step, you can select and activate one or more options to accept online payments and offline payments as well. All payment gateways offered are free extensions that are automatically installed and activated if selected. Some payment gateways require Jetpack and can be deactivated and uninstalled if you later decide to not use them.
In some payment gateways, such as WooCommerce Payments, Stripe and PayPal, we help you create an account in the payment provider, go through the authentication flow and complete the process within this step, so you can start accepting payments right away.
There are a few possible scenarios, depending on where your store is located and the information you provided during the store profiler.
If your store is located in the United States and you have Jetpack connected you’ll have access to the WooCommerce Payments option alongside Stripe and Paypal. The WooCommerce Payments option will also become available in this task for stores without a Jetpack connection in the upcoming weeks.
If you live in another country than the United States you’ll have Stripe and PayPal at your disposal if these providers are available in your country.
If you selected that you plan to sell products in person in the Business Details step, we’ll also display Square as an option.

If you are located in Austria, Denmark, Finland, Germany, the Netherlands, Norway, Sweden, or the UK, you are also shown Klarna as a payment option.

If you are located in South Africa, you are also shown PayFast as a payment option.

If you’re located in the United States and want to sell CBD products, you need to select “CBD and other hemp-derived products” as Industry in the Store Profiler and you’ll be able to use Square as the payment gateway.
You can also easily set up offline payments such as Cash on Delivery and Direct Bank Transfer.
Completing the store checklist
Once you complete the checklist, you’ll have the opportunity to hide it or keep it, in case you want to use it to quickly add more products, change shipping rates, etc.
Reusing the setup wizard
If you want to enable or disable the store profiler, the checklist, or even the whole setup wizard, you can do it through the Help panel that’s available in some WooCommerce pages.
- Go to any of the WooCommerce page in the WordPress Admin.
- Select “Help” at the top right corner.
- Choose the “Setup Wizard” tab.
Was this article helpful?
That’s Great!
Thank you for your feedback
Sorry! We couldn't be helpful
Thank you for your feedback
Feedback sent
We appreciate your effort and will try to fix the article